
In work and life, scanning documents is a very high-frequency demand. Compared with traditional scanners, scanning with mobile phones is obviously a more convenient choice. However, using the free version of the scanning app on the market, there will be conspicuous logo watermarks and wide page margins, making electronic documents appear unprofessional, especially when sent to customers. If you want to remove the watermark, you have to have a member, which is an additional cost.
In fact, for iPhone users, we can use the memo scanning document tool that comes with the phone, which is convenient and free. For important documents, the privacy is better.
Let me talk about how to use the iPhone memo scanning tool.
How to use memo to scan documents?
The steps to scan files using iPhone Memo are as follows:
1. Open memo
Find and open the “Notes” app on your iPhone.
2. New memo
Click the “New” icon in the lower right corner to create a new memo.
3. Select scan function
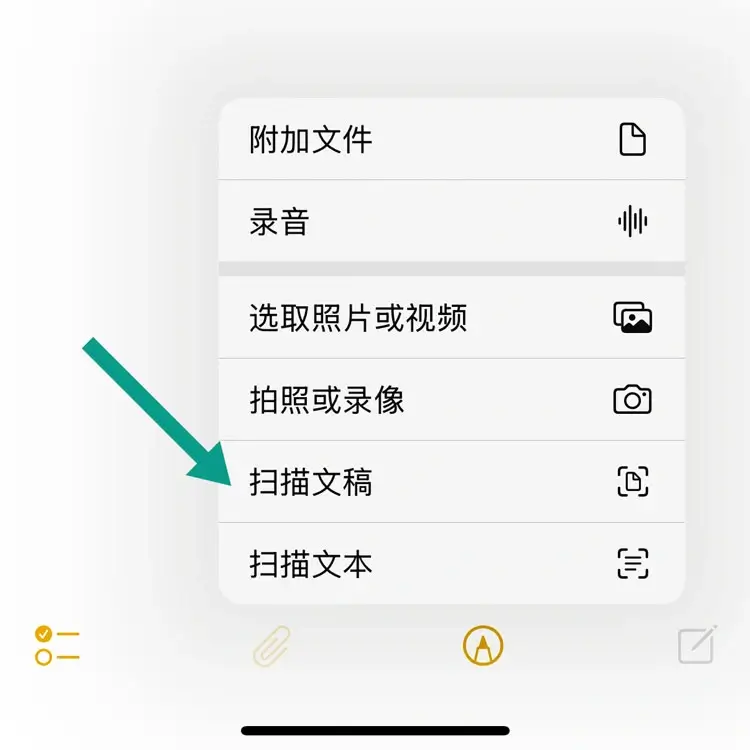
In the new memo, click the paper clip icon below, and then select “Scan Document” in the pop-up menu.
4. Scan files:

The file to be scanned is placed within the visible range of the camera, and the iPhone will automatically recognize and frame the file.
The default is automatic shooting mode. If necessary, you can click the automatic button at the top right to switch to manual mode, click the shutter button to shoot, and then you can adjust the range of the crop frame.
In automatic mode, after a file is scanned, you can immediately switch the file page to continue the automatic scanning.
5. adjust
At the top of the scanning interface, you can turn on the flash (three modes of automatic, on and off), and select the filter mode (four modes of color, grayscale, black and white, and photo).
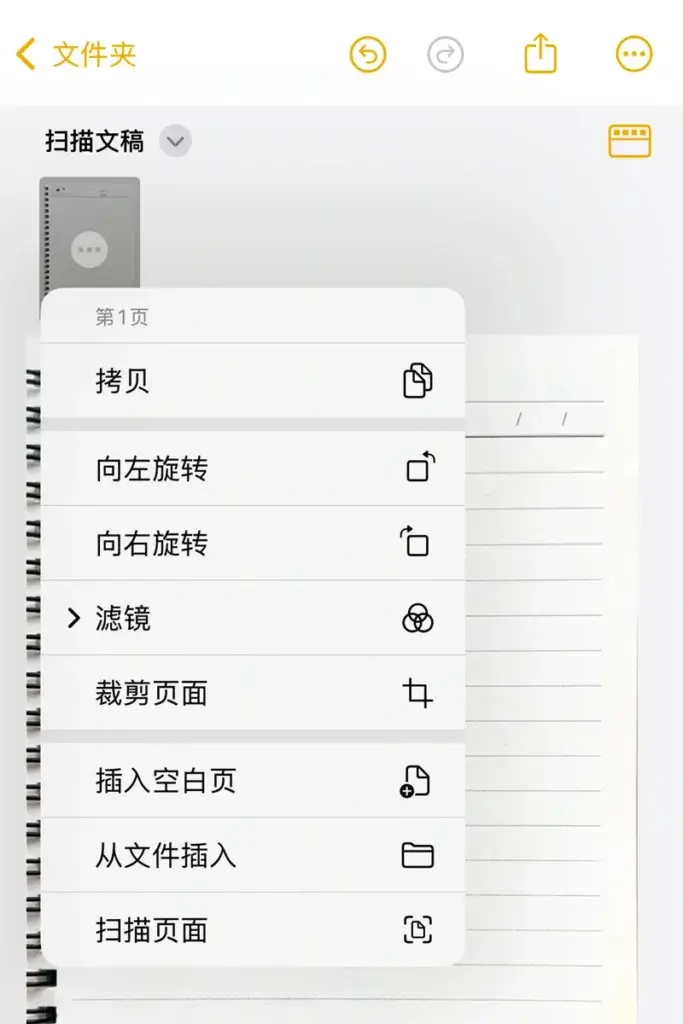
In automatic mode, if you need to adjust the range of filters and crop frames, you can click the button at the top right to exhale the thumbnail after scanning, click the three dots on the thumbnail, and find the filter and crop page in the pop-up menu.
6. Save and share
After completing all scans, click the "Save” button and the file will be saved in PDF format.
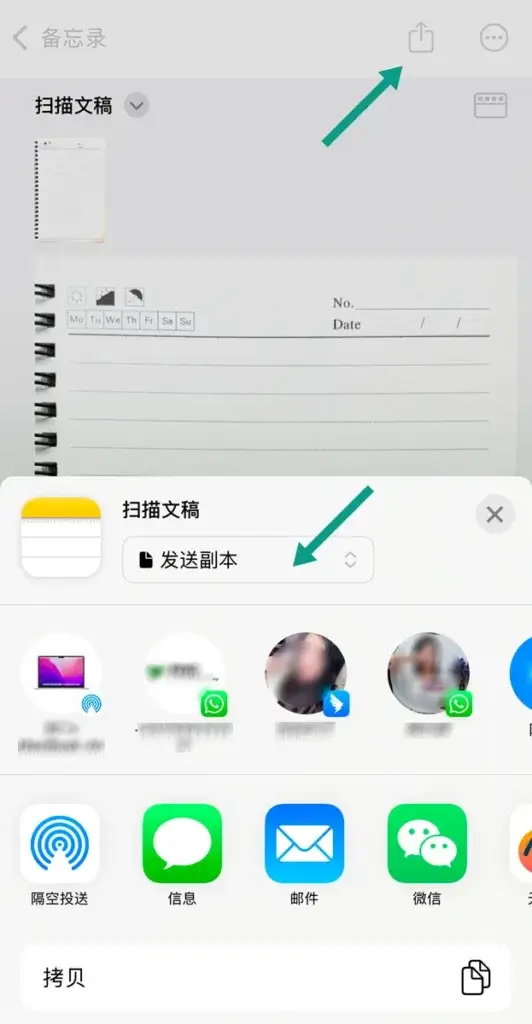
To send the scanned PDF file to your computer or other users, click the share icon in the upper right corner and select “Send Copy”. How to choose the sharing method (airdrop, WeChat, email, etc.) can be used.
7. Save as JPG
If you want to save the scanned file in JPG format, you can find “Memo” in “Settings” and turn on the “Save to Photo” function.
8. Add signature and comment
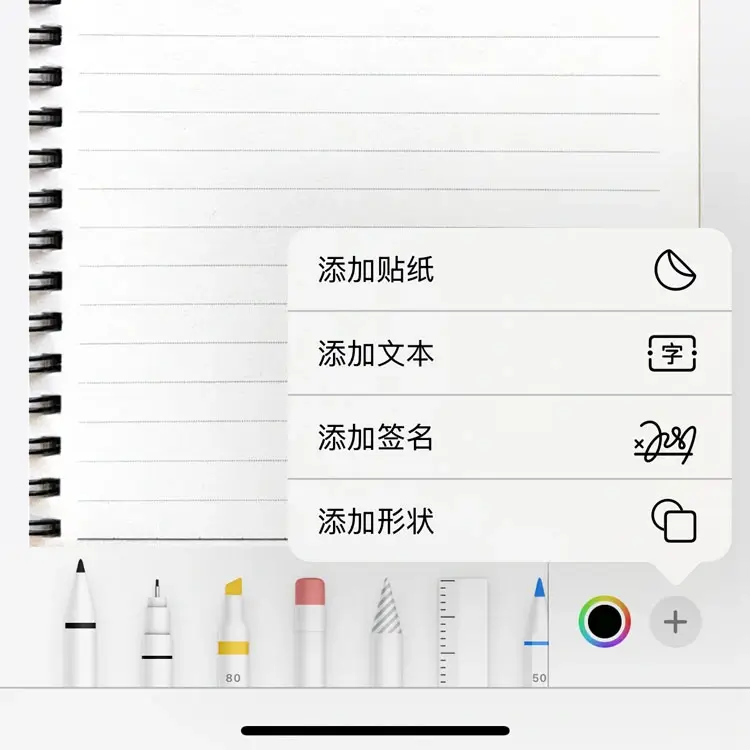
The memo also supports the functions of adding comments, scribing, adding signatures, stickers, etc. to scanned documents. Users can complete multiple tasks in the same application in the memo to improve work efficiency. Just click the pencil icon below, and then click the plus button, you can exhale the menu to add a signature.
Through the above simple steps, you can easily use the iPhone's memo function to scan all kinds of documents and documents, which is very convenient and practical. If there are many files that need to be scanned, you can prepare a mobile phone holder, clip the iPhone parallel to the desktop at a certain height, adjust the height according to the file size, and turn on the automatic scanning mode. Then, as long as you keep putting the file pages that need to be scanned on the desktop, you can achieve fast automatic scanning.
Comment List (0):
Load More Comments Loading. . .